On the evening of the 23rd of august I wanted to migrate this server to Ubuntu 24.04, as it was still on Ubuntu 20.04. The offline backup worked great, but the restore not so much. I wasn’t able to get the system to boot again afterwards.
At 2am, I just gave up and went to bed. Next day at 1pm, after a fresh reinstall and about three hours of work, I’ve got the website back up, and the public quake servers are running again. But there is still a lot of work ahead restoring other systems.
For instance, some subdomains (quake.froschgrosch.de, df.quakenewbies.com) have not yet been restored. As annoying as the situation is, it is a good opportunity for me to restructure. I’m thinking about a subdomain like files.froschgrosch.de, where all files used by various services are hosted. Also, the TLS certificates that I had automated with certbot – while convenient – were kind of difficult from a security standpoint. If the DNS API token were to be compromised, bad actors could have messed up the entire froschgrosch.de domain.
In case something is not working, give me a few days and I’ll hopefully have fixed it.
My dad has owned an ancient Panasonic DMR-EX71S Digital Video Recorder for quite a while now, and in the last few months, I grew increasingly fearful of losing the old recordings (due to hard drive failure) that are stored on there. After a bit of reading online, I had a plan to put into practice.
Dumping the hard disk with dd
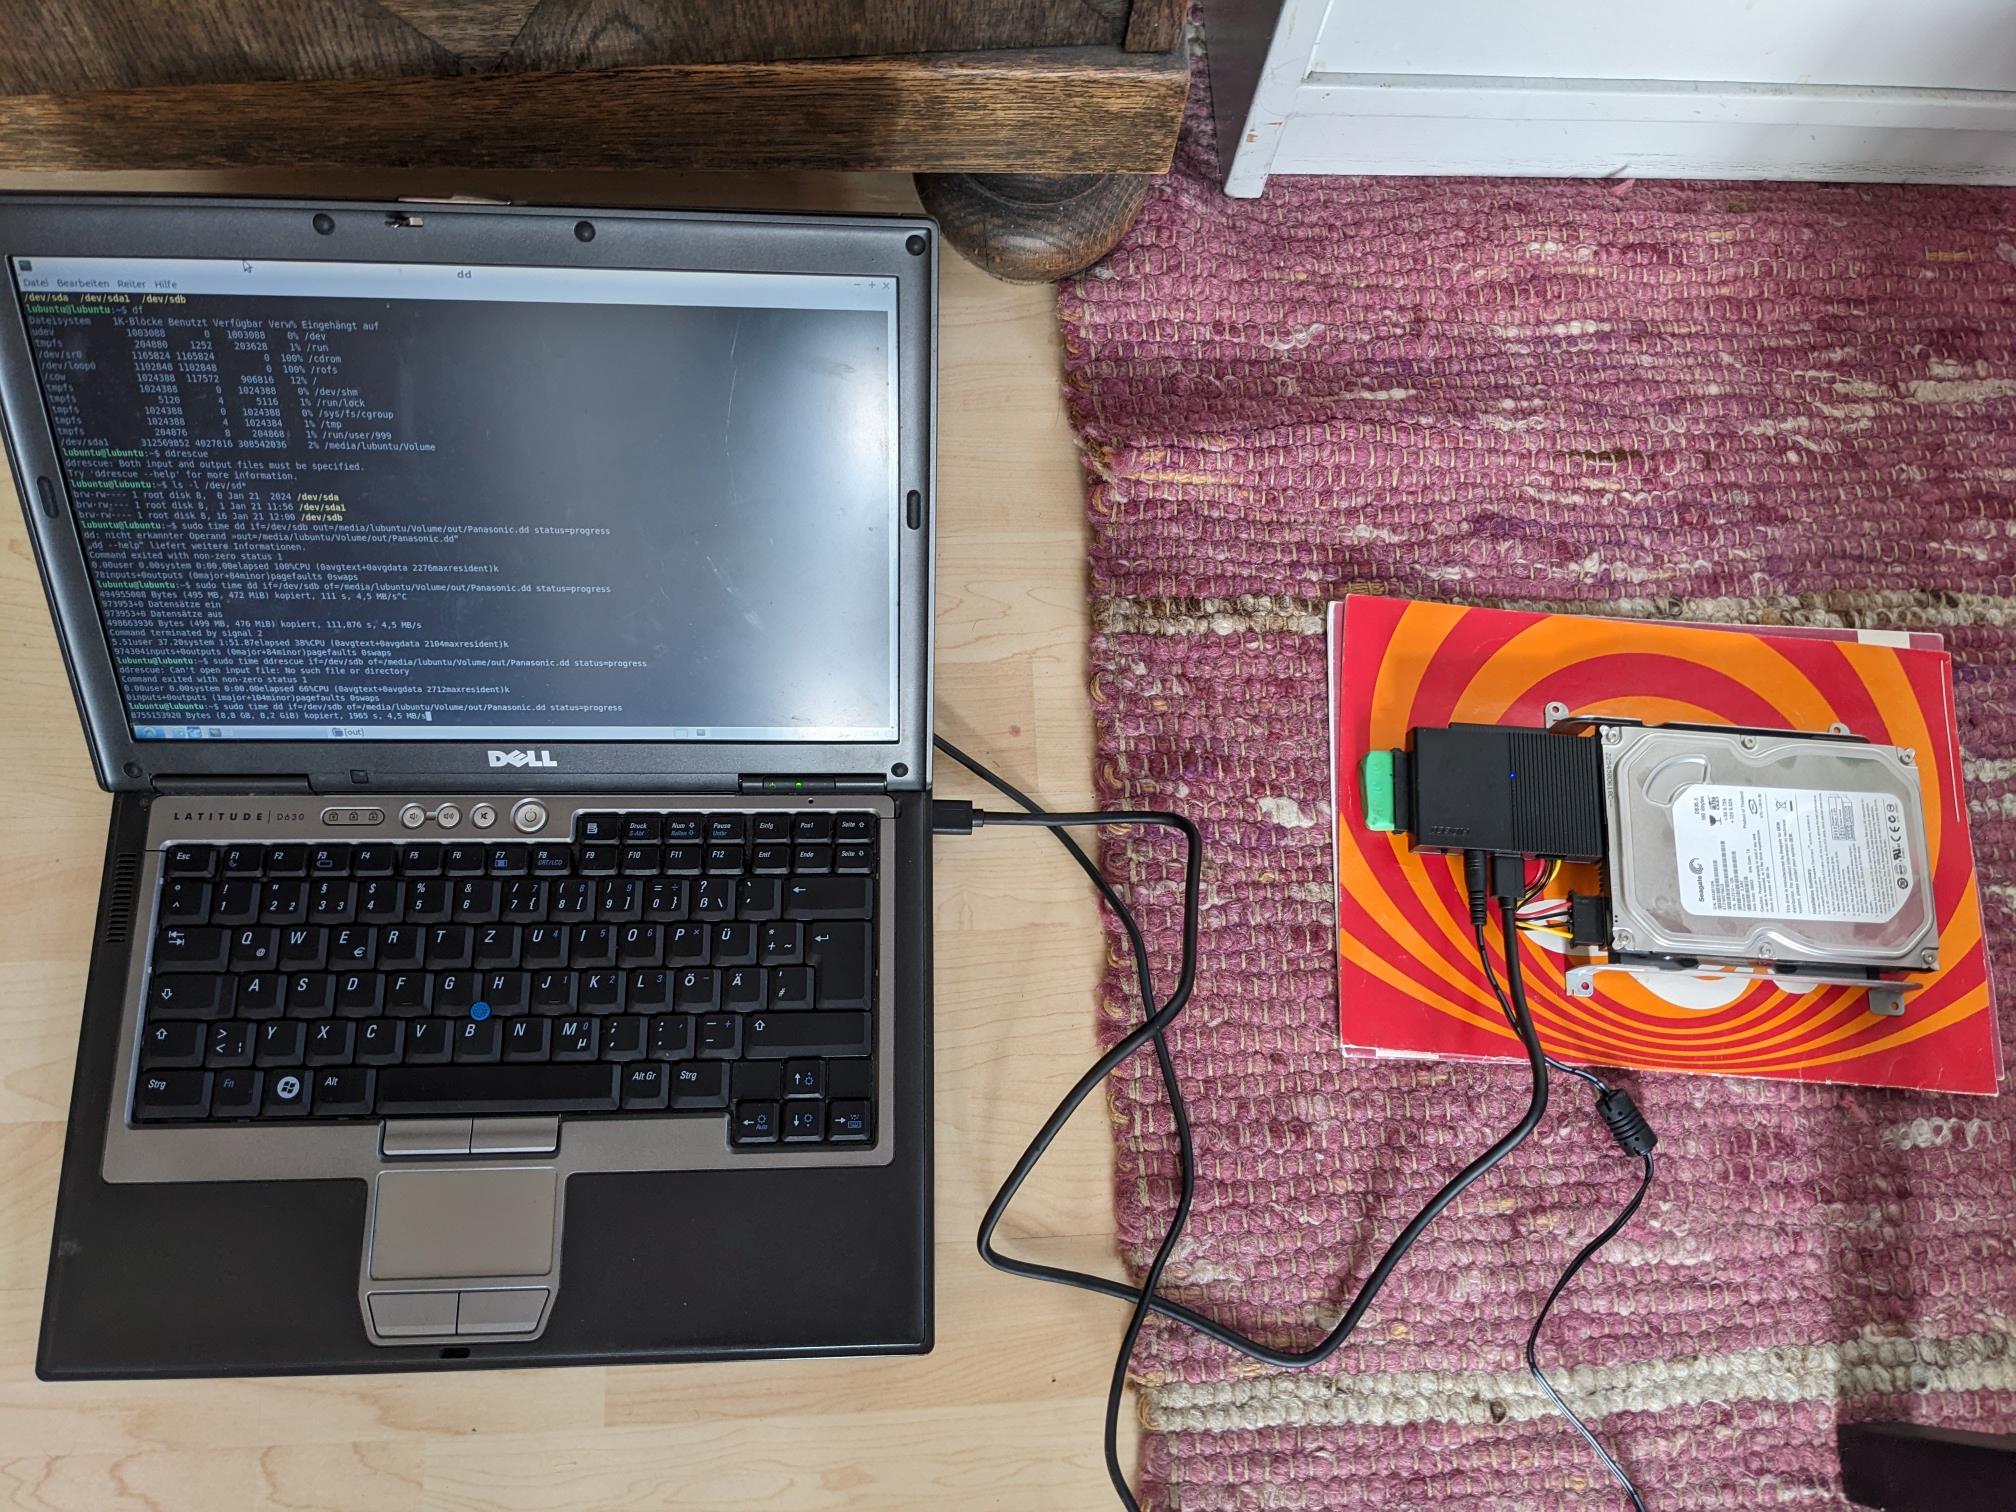
The first step of the recovery was creating a hard drive image, and my old Dell D630 Notebook seemed like a good choice as the process could possibly take a while and I didn’t want to occupy a device which I might would have wanted to use during that time.
I put a blank 320GB hard disk inside, onto which we will write the dump. It will be easy to transfer the files onto my computer that way. After burning Lubuntu 18.04 onto a DVD and booting it up, it was time to do the actual dumping.
The speed was painfully slow, about 4.5 MB/s. It took about ten whole hours to dump the 160 Gigabyte hard disk. Maybe a different USB port would have been quicker on that one, but it didn’t matter too much in the end.
A picture of the extraction setup.
Extraction & Post-Processing
Luckily, someone before me already had the same problem and wrote an utility for extracting. Otherwise, it wouldn’t have been possible for me. They were kind enough to provide source and binaries. The program took quite a while to run, but it was a lot of data after all, so that’s fine.
After the tool had finished the extraction process, I was left with a big folder full of files.
2010-10-17 22:35:01     40k 0016.IFO
2010-12-24 02:58:00     51k 0038.IFO
2011-10-03 13:10:00      3k 0126.IFO
2010-10-17 22:35:02     40k 0016.BUP
2010-12-29 09:15:08    429M 0051.VRO
2011-05-05 02:55:02     46k 0147.IFO
and so on ...
Obviously, there were some rather old videos on there (about 14 years at this point). But nothing was named, and I wasn’t gonna do that all manually. So a quick snippet of powershell did at least some of the work for me.
After extracting the information for each recording, I went over everything and decided what to keep and what to throw away. In the end, I was left with about 100GB of old MPEG2 videos.
I am quite happy with the result, as with the acquired disk image, it would even be possible to replace the hard drive, should it fail. And one last thing: For those that are interested in the media properties, here is a dump of the ffprobe output.
In September 2023 I wrote an article about recording gameplay from my Wii Console, and after about two months of usage I have come to a few conclusions and decided to change a few things to just have the system work better.
Here is a quick rundown of the problems that I have noticed and attempted to fix:
Synchronization issues
Synchronization of the audio and video on long recordings seemed to be drifting off a bit. It might have been because of the stream copying in the 60fps mode. A proposed fix is intermediary encoding with FFV1 (mainly because it needs to be fast and temporary file size is not a concern) and then final encoding as before with x264.
The previously used scripts have been updated accordingly, they are now available on GitHub. Note: The current version is here.
Not seeing the ffmpeg output while playing games
Occasionally, ffmpeg would just drop frames or stop working entirely. I’m sure that is a problem with my slow computer and not the program, but still, it would be good to see what is going on while recording. I’ve added a spare monitor to the setup where I can read the output.
Update: It seems that increasing the size of the realtime buffer has fixed the frame drop problems. Not sure if frames were actually dropped because the buffer wasn’t filled completely, the warning appeared at 63 percent.
Moving files, again
I initially recorded directly onto the SD card because I thought that encoding on the CPU of that computer would be too slow, and in fact is for realtime. It turned out that does not matter much, and forgetting to grab the card before and after a session turned out more problematic than that.
The computer has a 1TB hard drive that is fast enough to take the FFV1/FLAC stream I’ve come up with. Some rough calculations showed that I can record about eight hours of gameplay in that format before the HDD is full. Afterwards I can just run the ingest script and convert the recordings of a session to h264/aac.
For moving, it turned out fine to just do it over the Wifi. The PC has a relatively slow connection, it reaches about 5 MB/s for the file transfer when I’m lucky. But considering that 20 minutes of footage are only about 0.5 GB, I think it is good enough.
Conclusion
So far, I’m still pretty satisfied. The problems I’ve had so far aren’t that big of a deal really and I was able to fix them reasonably well. In case anything more comes up I will probably update this post.
For a very long time now I’ve wanted to have a way to record gameplay from my Wii, mostly just to preserve the cool moments of our playing sessions. After doing a bit of research I stumbled across RetroRGB, where a great guide has been written up for video capture.
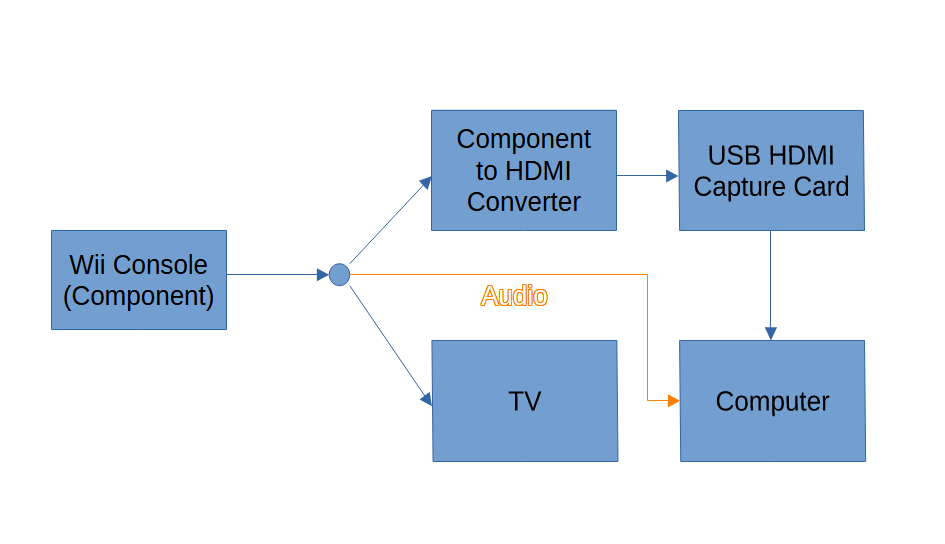
Signal chain
I already had a Component-to-HDMI converter by chance, and after seeing that the little HDMI converter dongle costed a mere 8€ with shipping, I just couldn’t resist. After quickly planning the signal chain, I just kind of ordered the converter and one additional cable.
There are quite a bit of components between the signal source and the destination, but it seemed cheap and image quality was not a concern. Recording at real time much more so.
Setting it up
The computer that I had installed recently for use with the TV isn’t the most powerful, and GPU Hardware encoding was out of the question with the GT705. I planned to use ffmpeg to record the footage as it is lightweight and just works if you figure out the right parameters.
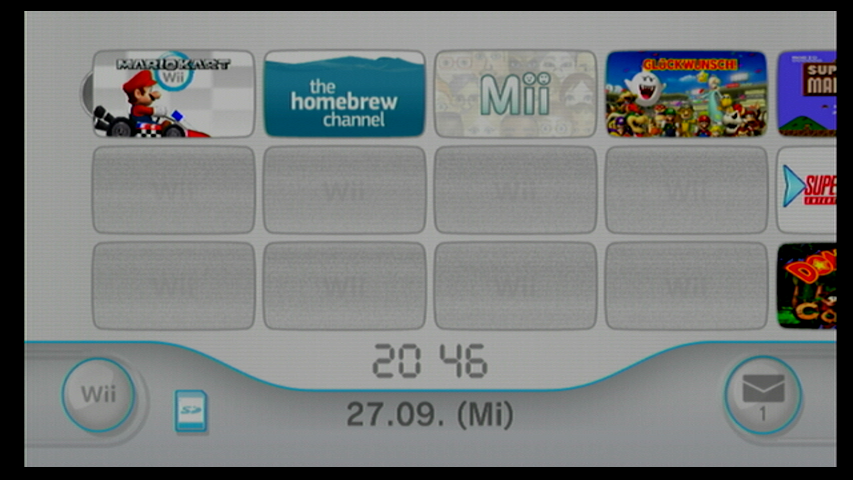
Eventually everything arrived in the mail, and it was time to do the wiring. I didn’t anticipate how messy it would get, but luckily I had a place to put everything. Firing it up for the first time, I was very happy to see the Wii homescreen displayed in VLC.
After that, it was time to figure out the recording with ffmpeg.
Recording with ffmpeg
For 30fps, which is used for example by Mario Kart in 3/4-player-mode, the CPU was powerful enough to encode in realtime with the desired quality. Unfortunately, it just wasn’t enough in 60fps. On the preset medium (a good tradeoff between speed and compression) frames were dropped constantly.
I finally decided to just copy the stream, move the file to my main PC and then encode there. Thanks to the Ryzen 7 3800X it was able to hit about 5x realtime no problem. Furthermore, that approach allowed me to tune the quality settings, audio codec and pretty much everything else afterwards.
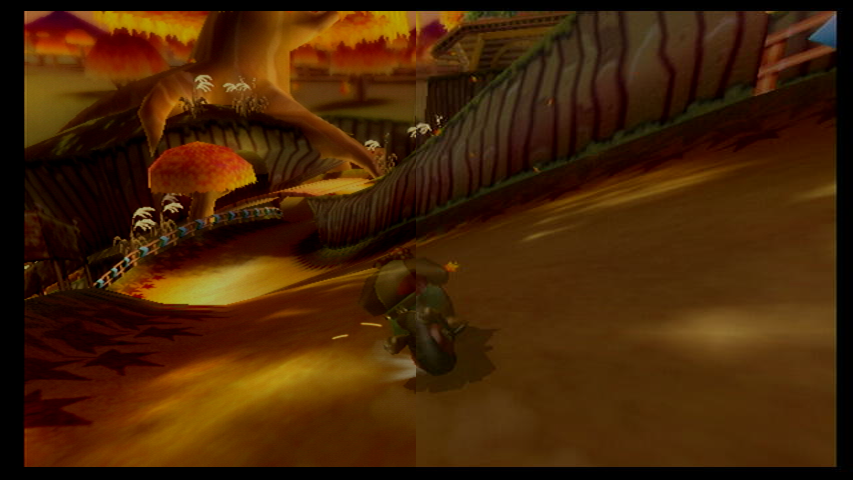
One thing that is a bit disappointing is the recording quality in 60fps. While I can get lossless footage when using 30fps, it seems that the only way to get 60fps is using the mjpeg codec, where the artifacts are clearly visible when zooming in on stills.
You can also download the screenshots for comparison here.
While this is annoying, in the end it is no big deal, because I wasn’t expecting crystal clear quality from a 6€ device anyways, and constant 60fps with no dropped frames are more important to me than the improved picture at 30fps.
Moving files
I briefly considered copying the files over my home network. That was quickly scrapped because it was just too slow. Then I remembered that I have an unused 128GB SD Card, and the recording computer just happens to have a built-in card reader. My tests concluded that the throughput was enough, so I settled for directly recording onto the SD card.
Automating it
After getting ffmpeg to work, I wanted to make it less of a hassle to use. As always, a quick powershell script was put together. Well, two actually (if you are interested, you can grab them here).
On the recording side the program prompts you to enter the game and the recording mode. Then, it automatically creates a filename, for easy identification later, and starts ffmpeg for recording. For the transcoding on my main PC you just configure the paths once, and then just run the script and it will ingest all files on the SD card and put them in the correct folder afterwards.
Conclusion
Overall, I’m very happy with the solution I came up with. It doesn’t cost very much, quality is decent enough for my purposes and it is relatively hassle-free to use. I know that this post is less like a guide or tutorial, but maybe it can be helpful regardless.
I have once again set up a new server, and this time I tried to install WordPress for my homepage. Now that it is working, I guess I’ll need to write blog posts. I don’t quite know where to take this yet, but we will see.
The files that were hosted before are not directly on this server anymore. I have set up a folder in my Nextcloud instance where everything can be found. The directory structure remains mostly unchanged.
The old file index
Hopefully I can do something meaningful with this blog, but only time will tell.