On the evening of the 23rd of august I wanted to migrate this server to Ubuntu 24.04, as it was still on Ubuntu 20.04. The offline backup worked great, but the restore not so much. I wasn’t able to get the system to boot again afterwards.
At 2am, I just gave up and went to bed. Next day at 1pm, after a fresh reinstall and about three hours of work, I’ve got the website back up, and the public quake servers are running again. But there is still a lot of work ahead restoring other systems.
For instance, some subdomains (quake.froschgrosch.de, df.quakenewbies.com) have not yet been restored. As annoying as the situation is, it is a good opportunity for me to restructure. I’m thinking about a subdomain like files.froschgrosch.de, where all files used by various services are hosted. Also, the TLS certificates that I had automated with certbot – while convenient – were kind of difficult from a security standpoint. If the DNS API token were to be compromised, bad actors could have messed up the entire froschgrosch.de domain.
In case something is not working, give me a few days and I’ll hopefully have fixed it.
My dad has owned an ancient Panasonic DMR-EX71S Digital Video Recorder for quite a while now, and in the last few months, I grew increasingly fearful of losing the old recordings (due to hard drive failure) that are stored on there. After a bit of reading online, I had a plan to put into practice.
Dumping the hard disk with dd
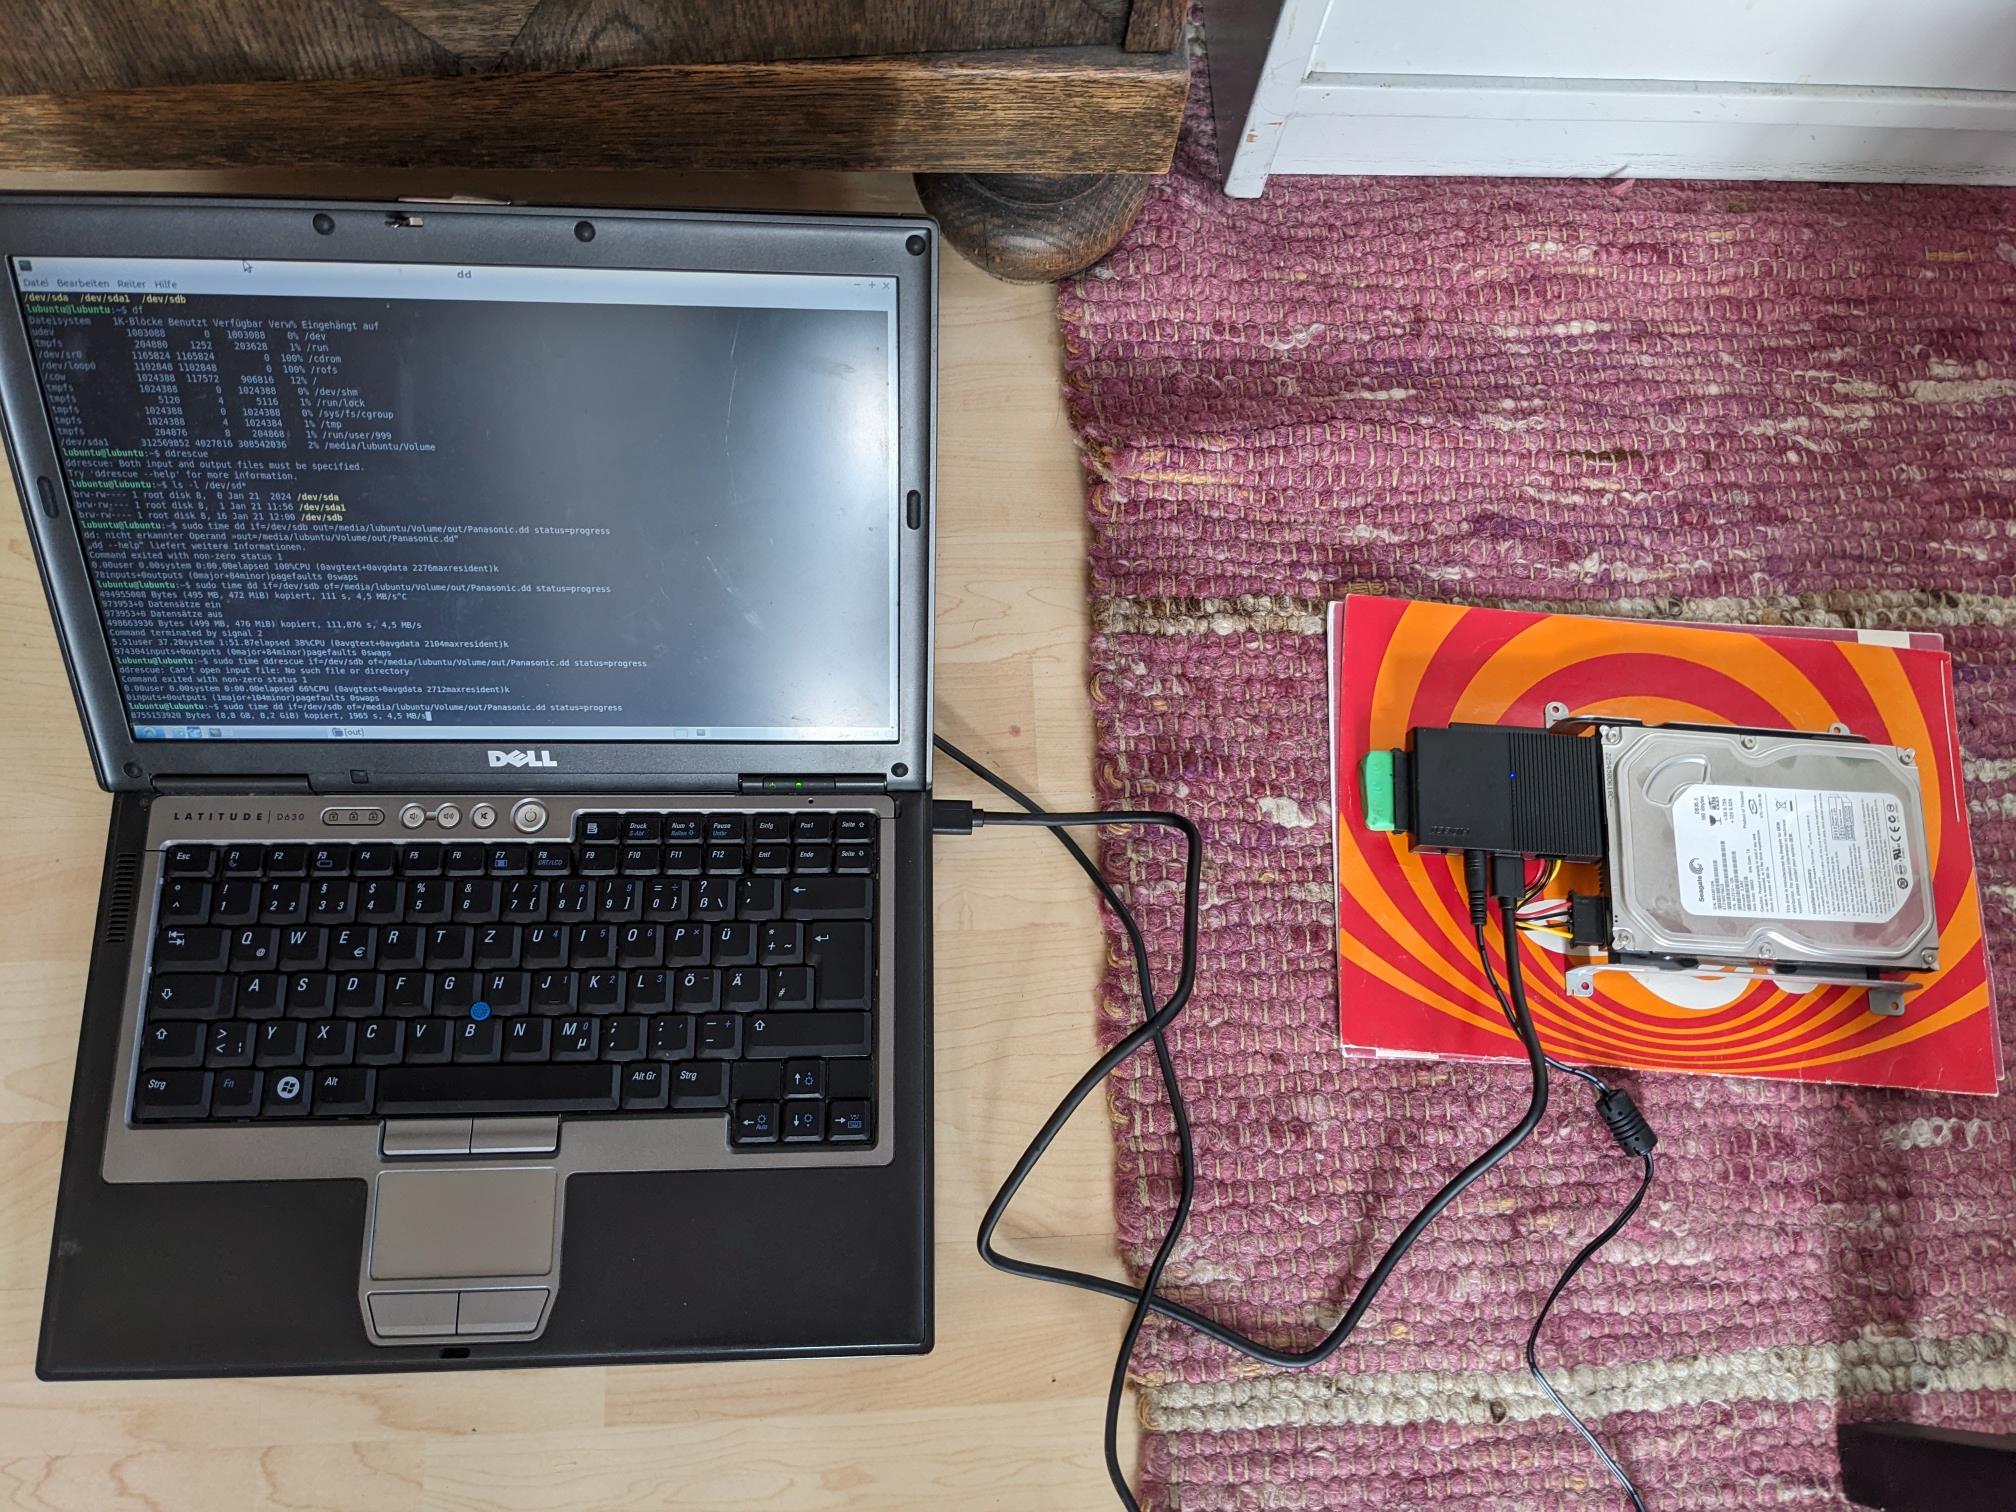
The first step of the recovery was creating a hard drive image, and my old Dell D630 Notebook seemed like a good choice as the process could possibly take a while and I didn’t want to occupy a device which I might would have wanted to use during that time.
I put a blank 320GB hard disk inside, onto which we will write the dump. It will be easy to transfer the files onto my computer that way. After burning Lubuntu 18.04 onto a DVD and booting it up, it was time to do the actual dumping.
The speed was painfully slow, about 4.5 MB/s. It took about ten whole hours to dump the 160 Gigabyte hard disk. Maybe a different USB port would have been quicker on that one, but it didn’t matter too much in the end.
A picture of the extraction setup.
Extraction & Post-Processing
Luckily, someone before me already had the same problem and wrote an utility for extracting. Otherwise, it wouldn’t have been possible for me. They were kind enough to provide source and binaries. The program took quite a while to run, but it was a lot of data after all, so that’s fine.
After the tool had finished the extraction process, I was left with a big folder full of files.
2010-10-17 22:35:01     40k 0016.IFO
2010-12-24 02:58:00     51k 0038.IFO
2011-10-03 13:10:00      3k 0126.IFO
2010-10-17 22:35:02     40k 0016.BUP
2010-12-29 09:15:08    429M 0051.VRO
2011-05-05 02:55:02     46k 0147.IFO
and so on ...
Obviously, there were some rather old videos on there (about 14 years at this point). But nothing was named, and I wasn’t gonna do that all manually. So a quick snippet of powershell did at least some of the work for me.
After extracting the information for each recording, I went over everything and decided what to keep and what to throw away. In the end, I was left with about 100GB of old MPEG2 videos.
I am quite happy with the result, as with the acquired disk image, it would even be possible to replace the hard drive, should it fail. And one last thing: For those that are interested in the media properties, here is a dump of the ffprobe output.
In September 2023 I wrote an article about recording gameplay from my Wii Console, and after about two months of usage I have come to a few conclusions and decided to change a few things to just have the system work better.
Here is a quick rundown of the problems that I have noticed and attempted to fix:
Synchronization issues
Synchronization of the audio and video on long recordings seemed to be drifting off a bit. It might have been because of the stream copying in the 60fps mode. A proposed fix is intermediary encoding with FFV1 (mainly because it needs to be fast and temporary file size is not a concern) and then final encoding as before with x264.
The previously used scripts have been updated accordingly, they are now available on GitHub. Note: The current version is here.
Not seeing the ffmpeg output while playing games
Occasionally, ffmpeg would just drop frames or stop working entirely. I’m sure that is a problem with my slow computer and not the program, but still, it would be good to see what is going on while recording. I’ve added a spare monitor to the setup where I can read the output.
Update: It seems that increasing the size of the realtime buffer has fixed the frame drop problems. Not sure if frames were actually dropped because the buffer wasn’t filled completely, the warning appeared at 63 percent.
Moving files, again
I initially recorded directly onto the SD card because I thought that encoding on the CPU of that computer would be too slow, and in fact is for realtime. It turned out that does not matter much, and forgetting to grab the card before and after a session turned out more problematic than that.
The computer has a 1TB hard drive that is fast enough to take the FFV1/FLAC stream I’ve come up with. Some rough calculations showed that I can record about eight hours of gameplay in that format before the HDD is full. Afterwards I can just run the ingest script and convert the recordings of a session to h264/aac.
For moving, it turned out fine to just do it over the Wifi. The PC has a relatively slow connection, it reaches about 5 MB/s for the file transfer when I’m lucky. But considering that 20 minutes of footage are only about 0.5 GB, I think it is good enough.
Conclusion
So far, I’m still pretty satisfied. The problems I’ve had so far aren’t that big of a deal really and I was able to fix them reasonably well. In case anything more comes up I will probably update this post.
This is just a quick post to let you know that I’ve added the readme files/documentation for various quake mods to the site https://files.froschgrosch.de/quakedocs. I’ve also put a link in the menu at the top. At the time of writing, the following mods are available:
For a very long time now I’ve wanted to have a way to record gameplay from my Wii, mostly just to preserve the cool moments of our playing sessions. After doing a bit of research I stumbled across RetroRGB, where a great guide has been written up for video capture.
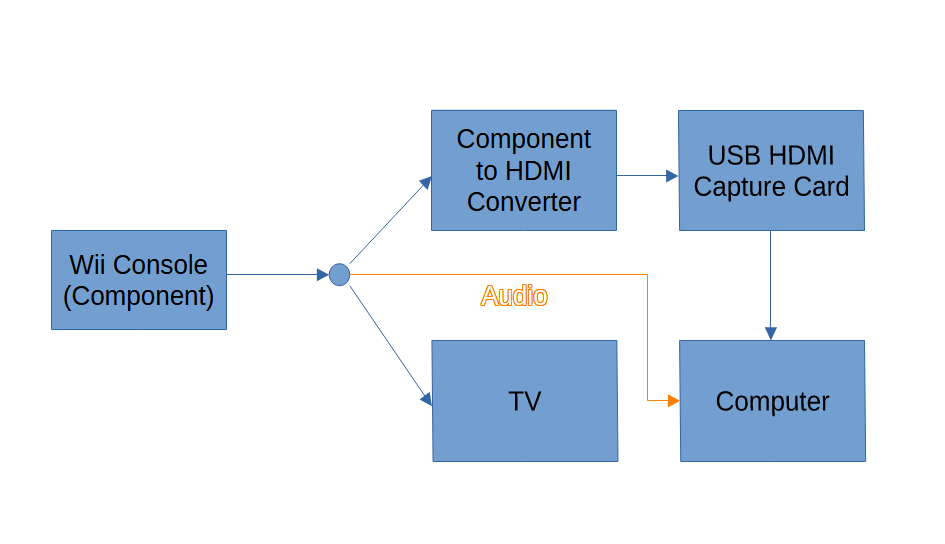
Signal chain
I already had a Component-to-HDMI converter by chance, and after seeing that the little HDMI converter dongle costed a mere 8€ with shipping, I just couldn’t resist. After quickly planning the signal chain, I just kind of ordered the converter and one additional cable.
There are quite a bit of components between the signal source and the destination, but it seemed cheap and image quality was not a concern. Recording at real time much more so.
Setting it up
The computer that I had installed recently for use with the TV isn’t the most powerful, and GPU Hardware encoding was out of the question with the GT705. I planned to use ffmpeg to record the footage as it is lightweight and just works if you figure out the right parameters.
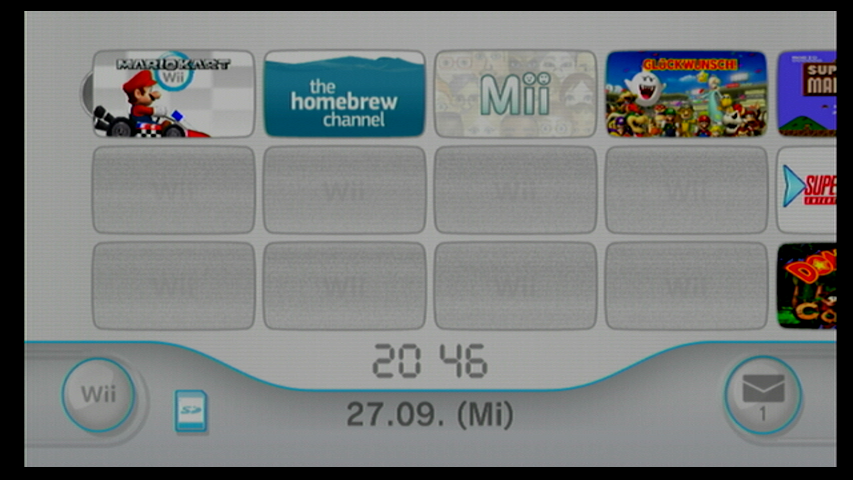
Eventually everything arrived in the mail, and it was time to do the wiring. I didn’t anticipate how messy it would get, but luckily I had a place to put everything. Firing it up for the first time, I was very happy to see the Wii homescreen displayed in VLC.
After that, it was time to figure out the recording with ffmpeg.
Recording with ffmpeg
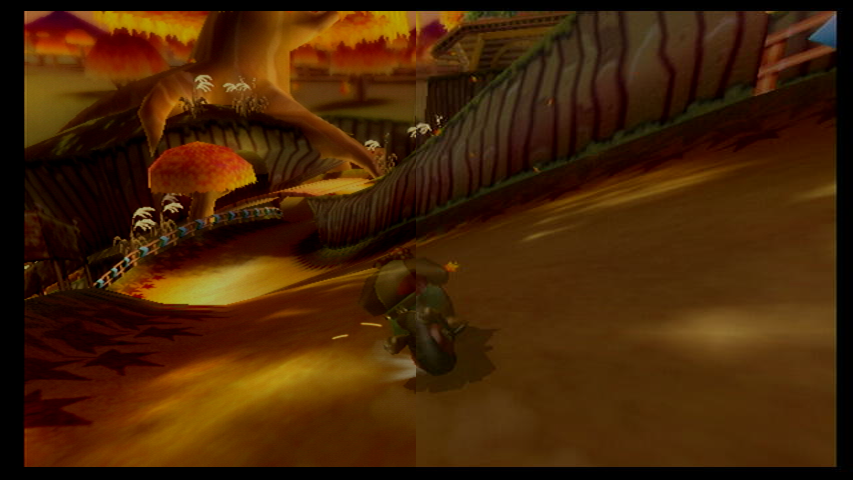
For 30fps, which is used for example by Mario Kart in 3/4-player-mode, the CPU was powerful enough to encode in realtime with the desired quality. Unfortunately, it just wasn’t enough in 60fps. On the preset medium (a good tradeoff between speed and compression) frames were dropped constantly.
I finally decided to just copy the stream, move the file to my main PC and then encode there. Thanks to the Ryzen 7 3800X it was able to hit about 5x realtime no problem. Furthermore, that approach allowed me to tune the quality settings, audio codec and pretty much everything else afterwards.
One thing that is a bit disappointing is the recording quality in 60fps. While I can get lossless footage when using 30fps, it seems that the only way to get 60fps is using the mjpeg codec, where the artifacts are clearly visible when zooming in on stills.
You can also download the screenshots for comparison here.
While this is annoying, in the end it is no big deal, because I wasn’t expecting crystal clear quality from a 6€ device anyways, and constant 60fps with no dropped frames are more important to me than the improved picture at 30fps.
Moving files
I briefly considered copying the files over my home network. That was quickly scrapped because it was just too slow. Then I remembered that I have an unused 128GB SD Card, and the recording computer just happens to have a built-in card reader. My tests concluded that the throughput was enough, so I settled for directly recording onto the SD card.
Automating it
After getting ffmpeg to work, I wanted to make it less of a hassle to use. As always, a quick powershell script was put together. Well, two actually (if you are interested, you can grab them here).
On the recording side the program prompts you to enter the game and the recording mode. Then, it automatically creates a filename, for easy identification later, and starts ffmpeg for recording. For the transcoding on my main PC you just configure the paths once, and then just run the script and it will ingest all files on the SD card and put them in the correct folder afterwards.
Conclusion
Overall, I’m very happy with the solution I came up with. It doesn’t cost very much, quality is decent enough for my purposes and it is relatively hassle-free to use. I know that this post is less like a guide or tutorial, but maybe it can be helpful regardless.
Back in March 2021 when I joined Quake for Newbies some people were amused by my markDemo chatbind, the purpose of which I will tell you about here. There is a neat piece of software called UDT that allows you to cut QL and Q3 demos into little snippets. It has a feature where if it detects a specified chat message, it can automatically cut a demo from that bit of the game.
The idea is that you have a chatbind with some unique words that the software can recognize. Whenever something cool happens, you press your chatbind key, everyone will see that you have considered the frag or whatever happened interesting.
Creating a chat bind
My chatbind goes something like bind MOUSE5 say "burt, please mArKdEmO", but it would be no good if you would just copy that. You come up with your own chat message, like olmos Marker den frækkert. Then you do a bind like bind x say "message". Everytime you press x now there will be a message in the chat. Just make sure you’re recording a demo and mark your stuff then you’re set for the next step.
Setting up UDT
First, you’ll need to get UberDemoTools. It can be obtained from the official website. You might soon notice this error message that pops up when opening the application.
Update error
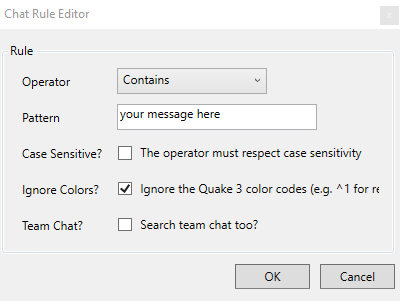
To fix it, just go to the Settings and disable the option “Start-up Updates”. Now for the actual demo cutting. First you will go to “Patterns” > “Chat” and create a new chat rule. You can change the parameters but sticking with the preset ones is fine.
Creating a chat rule
After your pattern is created, you can import some demos into UDT. Of course, you’re not restricted to only use the chat patterns, there are a bunch of other patterns as well that you can mess about with, I just personally am not using those, so feel free to let others know your findings.
Make sure you’re in the “Patterns” > “Chat”or in “Pattern Search” menu. Either drag-and-drop into the sidebar demo list, or use the file option up top to import some.
Cutting the demos
The next step is cutting (or searching). When you click the Cut! button, there will be a window where you can select the offset before and after the mark. You can tweak those for individual frags if it is too short. Default is 10/10, but doing some longer shouldn’t do any harm. After that, UDT will do its thing and put all the cut demos next to the demo they were created from. So if you had a demo foo.dm_91 in a folder, there will be some demos named foo_CUT_CHAT_blah.dm_91 in the folder now.
You can rename those with some scripts if that is your kind of thing, or use an application like Bulk Rename Utility, or alternatively Microsoft Power Toys.
What to do afterwards
When you eventually have all your demos cut, it is time to jump into the game and check them all. Watch each snippet and decide what to keep and what not to. Over time, you can amass a collection of cool frags.
You can use those demos like any other normal demo files, for example, you can render them in Wolfcam, or send them to other people that like to do movies. Or, for Quake 3 demos, you could use my demo rendering script, which might get an article written for it in the future.
This guide was originally written a while ago for the folks on the Quake for Newbies discord server. Feel free to join us!
Introduction
My preferred way to convert demos to videos is to use some kind of rendering opposed to just capturing the QL / Wolfcam / Q3 window in OBS.
In quake3e, it is supported to directly pipe the video to the ffmpeg application, which actually compresses the video with your encoder of choice. In most other cases, you will have to create a temporary file and encode that with ffmpeg (or other tools if you want). you can grab ffmpeg here.
Rendering in WolfcamQL
First, grab wolfcam on GitHub (Installation instructions are available in the readme). It is required that you have a copy of Quake Live.
Useful cvars
Set cl_freezeDemoPauseVideoRecording 1 to pause recording of video/screenshots while paused.
cl_aviCodec "huffyuv": The options for cl_aviCodec are uncompressed, huffyuv and mjpeg. I recommend huffyuv as it somewhat reduces temporary file size and doesn’t take much longer to capture in wolfcam. You can use mjpeg if you don’t have much disk space for temporary files, but it will slow down rendering significantly. It could also cause slight jpeg artifacts, although those won’t be so noticeable in the end result.
cl_aviFrameRate 60: Set the desired output video framerate here. The actual command for capturing in wolfcam is /video tga wav name render_temp You can replace render_temp with :demoname, and wolfcam will use the demo name as the capture filename. Or any other name, and the video will be saved to that. The rest of this guide assumes that the output name it is set to render_temp. After capturing, the captured files normally are in %appdata%/Wolfcamql/wolfcam-ql/videos (just paste that into your windows explorer address bar).
Encoding to h264
After capturing in-game, we will encode the .avi files to something more reasonable in size. We will use ffmpeg for that.
For convenience, I recommend creating a batch file to render the video. Navigate to the output folder, then Right-click/New/Text file, and name it render.txt. Open it in the text editor. Now, paste this into the file.
@echo off
ffmpeg -hide_banner -i render_temp.avi -c:v libx264 -crf:v 21 -preset:v medium -tune:v film -c:a aac -b:a 384k  "render_output.mp4"

echo.
echo Rendering finished.
pause
Then, do Save as, set the Filetype to “all files (*.*)” . I suggest naming it render.bat. Double click the batch file and it should start rendering. When rendering is complete, it will say “Rendering finished.”. After that, you can close that window and look at your output. It should now be ready to be used however you like.
Information for advanced encoding
-preset:v medium sets the “speed” of the encoder. It is a tradeoff between compression strength and rendering speed. Sensible presets are “veryfast”, “faster”, “fast”, “medium”, “slow”, “slower”.
-crf:v 21 sets the visual quality of the video (lower means better). Just try to see what is good enough for you, as a lower value will increase file size.
I recently disabled Hyper-V on my main computer because Windows was having some issues with the network adapters. In Hyper-V were two VMs that I used to build Quake3e (a modern Quake 3 source port) from source for Linux and Windows. As those weren’t operational anymore, I needed a new solution.
I briefly considered just moving the existing VMs to VirtualBox (which didn’t work because of networking issues), and after that, WSL came to mind.
After installing Ubuntu 20.04 it was time to get a build environment going. After setting up the github repo, I installed the packages make gcc libcurl4-openssl-dev mesa-common-dev as per the build instructions. After that, I could already build 64-bit dedicated executables.
Next step was mingw for windows binaries. mingw-w64 took care of that.
Now I needed to create 32-bit linux binaries, because Rocket Arena 3 doesn’t have the gamecode as a qvm and therefore requires the executable to load a native library. That only works when the binary is 32-bit.
One might need some 32-bit binaries for windows too, if they are still running a 32-bit machine. For building those 32-bit binaries I tried several different things and found that installing g++-multilib did the trick.
Here are the make-commands that I came up with (replace the “16” with the number of threads you want to use):
# Linux 64bit
time make -j16 BUILD_CLIENT=0

# Linux 32bit
time make -j16 BUILD_CLIENT=0 ARCH=x86

# Windows 32bit
time make -j16 USE_RENDERER_DLOPEN=0 USE_SDL=0 PLATFORM=mingw64 ARCH=x86

# Windows 64bit
time make -j16 USE_RENDERER_DLOPEN=0 USE_SDL=0 PLATFORM=mingw64
And here are all packages that you need to install:
# Generic requirements
sudo apt install git make gcc libcurl4-openssl-dev mesa-common-dev

# Windows
sudo apt install mingw-w64

# Additional for 32-bit binaries
sudo apt install g++-multilib

# For RUNNING 32-bit binaries on Ubuntu 20.04
sudo dpkg --add-architecture i386 && sudo apt update
sudo apt install libc6:i386 libstdc++6:i386 libncurses5:i386
So that concludes my method of building Quake3e. If this is of any help to you, feel free to let me know.
Update 2023-10-8
After further testing, I was able to conclude that running the 32-bit binaries is possible on a fresh Ubuntu 22.04.3 installation with the instructions provided.
Update 2023-12-31
Who would have thought that using more threads speeds up the compile times quite a bit? I’ve added the appropiate -j16 to the make calls.
I have once again set up a new server, and this time I tried to install WordPress for my homepage. Now that it is working, I guess I’ll need to write blog posts. I don’t quite know where to take this yet, but we will see.
The files that were hosted before are not directly on this server anymore. I have set up a folder in my Nextcloud instance where everything can be found. The directory structure remains mostly unchanged.
The old file index
Hopefully I can do something meaningful with this blog, but only time will tell.